3ds max Snow Tutorial – Part 2
Hello, and welcome to the second part of 3ds Max snow tutorial. In this part I will demonstrate to you another way to create a snow on object.
In this 3ds Max snow tutorial I will use ParticleFlow and BlobMesh objects to get final result. This method is a little better than the previous one but it is also more time and resource consuming.
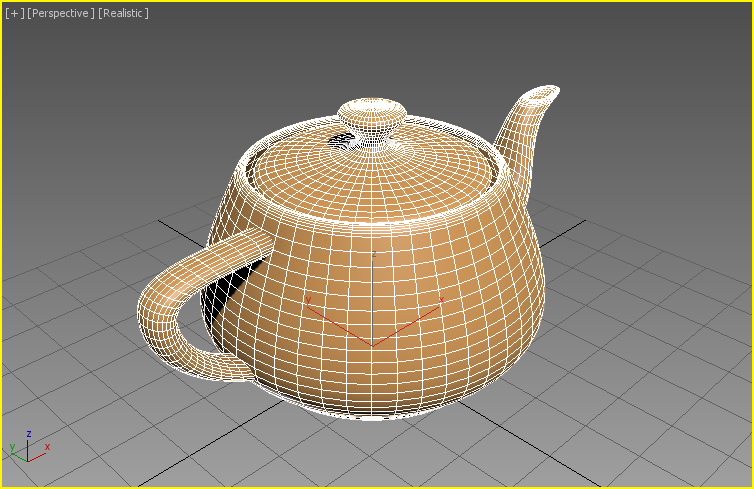
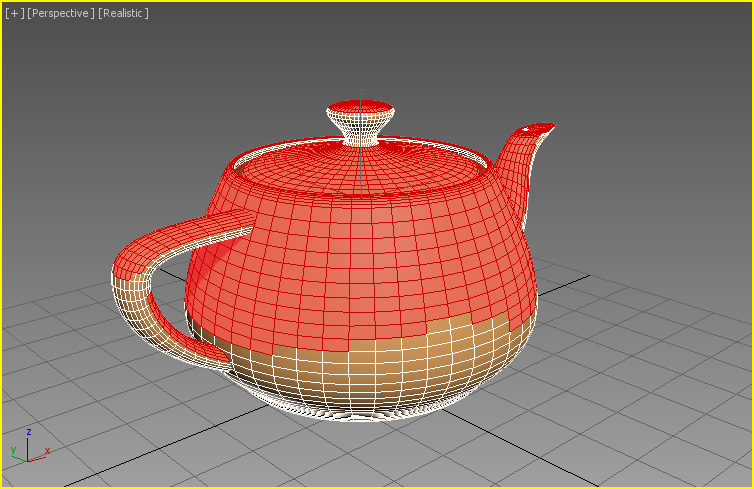
As in previous part I start by creating a simple Teapot with 12 segments and change it to Editable Poly. Now I am selecting all polygons from the top view. Remember to have Ignore Backfacing checked while doing that. I am also shrinking selection once and deselect some of the polygons by hand. You should have this after doing that.
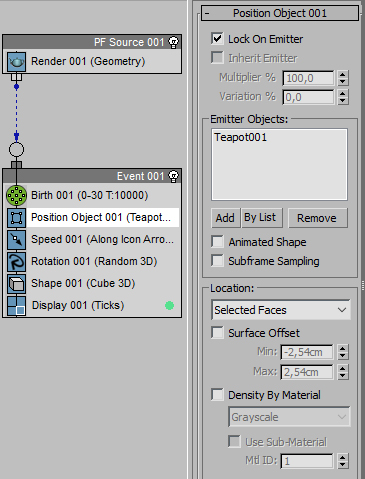
Now I am going to create a ParticleFlow object. Inside of it I am changing amount to 10000 in Birth. I am also replacing Position Icon with Position Object. In Position Object I am enabling Lock On Emitter and adding Teapot as Emitter Objects. Changing Location from Surface to Selected Faces is also necessary.
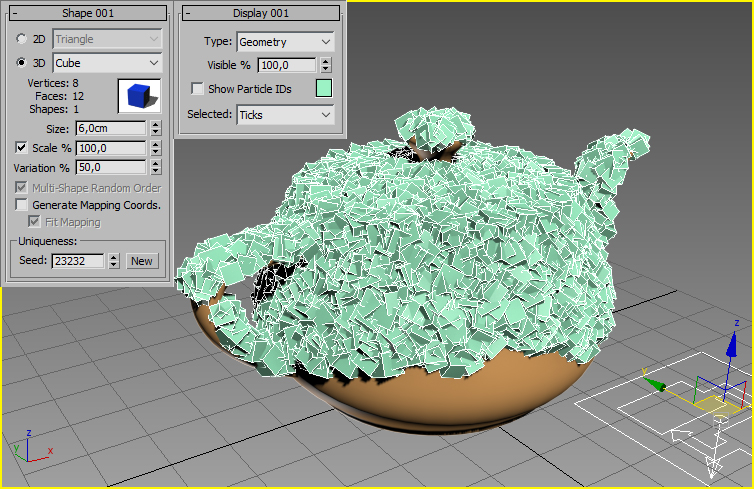
You can go to the 50th frame of animation to see results of ParticleFlow. But it is not over with this part. In Display change the Type to Geometry. It will allow to better see size of created particles. In shape change the size. For me it was 6cm but it will be different depending your model and scene size. In the same place also check Scale and change Variation to 50%.
You can change the Display Type back to Ticks and close the Particle View. Go to the Compound Objects in Create Geometry and create BlobMesh. Go to the Modify tab and Pick ParticleFlow as Blob Object.
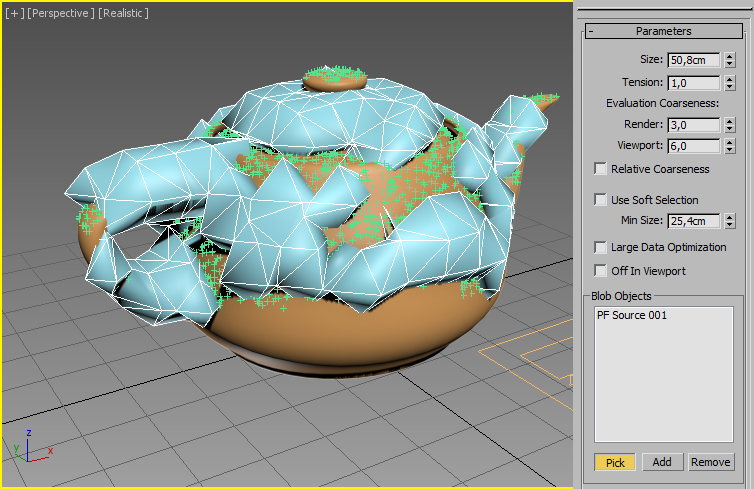
Now it is time to play a little with BlobMesh settings. In my case I changed Viewport Coarseness to 1 and checked Large Data Optimization.
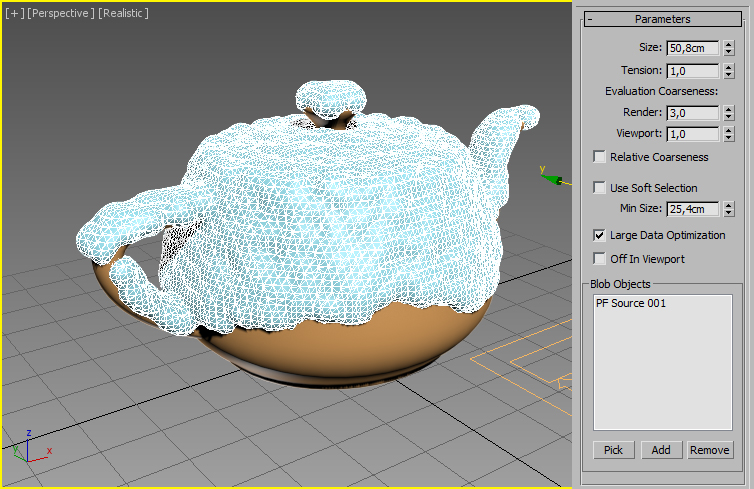
You need to convert the BlobMesh to Editable Poly. Add to it a Relax modifier with Value of 1 and with 2 Iterations. Relax settings could be different, depending the result you wish to get. Assign to it a white snow material and you should to have this.
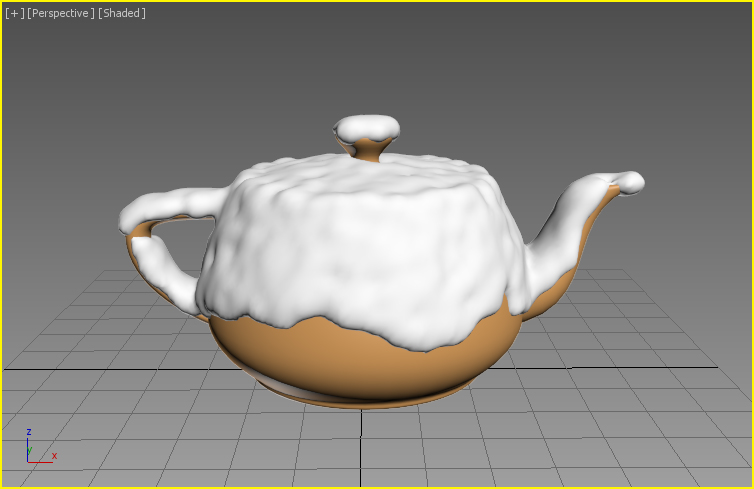
This method of creating snow will work great on simple or moderate complicated models. Final result looks much better then in first tutorial, but usage of ParticleFlow could be sometimes processor demending. In the next part I will try to show you third option – with more complicated ParticleFlow usage.
Tips for 3ds max Beginner Users
Tips for 3ds Max beginner users. Topology Optimization: Learn to create models with optimal topology, ensuring a minimal number of triangles and proper vertex distribution. Optimizing the topology of a model is crucial to achieve[...]
New Tools in Unreal Engine 5
Epic Games is making improvements to modeling in the new Unreal Engine 5. Thanks to the addition of a new technology called Nanite, it will be possible to enter data from Quixel and Reality Capture,[...]
USD for 3ds max
Autodesk recently announced that the USD beta plug-in beta for 3ds max 2022 will be publicly available. Users who are creating virtual reality projects for iOS on iOS will be pleased with this news. This[...]
Nuke 13
Nuke is one of the best video post-production tools out there and recently there was new version released. This software was used in the production of the greatest blockbusters. It is an ideal composition tool[...]
Sculptron 1.0
Sculptron is a GPU based software for sculpting and animation. Sculptron's main goal is not to compete with digital sculpting applications such as ZBrush. It is tasked with scupt animated meshes. It introduces many new[...]
Terrain Plugin
Terrain Plugin is a tool for 3ds max that allows you to generate landscapes inside this program. Recently a new version has been released. With Terrain Plugin for 3ds max, you can generate landscapes by[...]

